VCR-Head Scrollwheel

After removing all the existing electronics and wiring inside the VCR head, a dab of superglue was all it took and I now had an encoder wheel hard-mounted to the VCR head. Next step was figuring out how to hold the rest of the mouse in position to read the encoder wheel. I desoldered the buttons from the mouse to shrink the footprint, and then carved a block of foam to a shape that would fit the mouse board and support the VCR head.
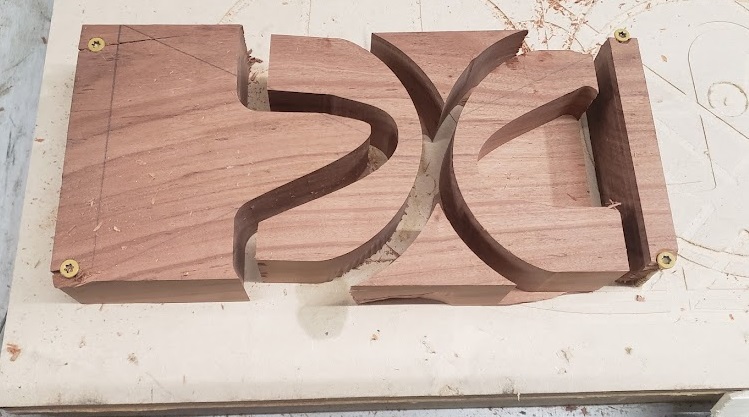
I traced the foam in cad, and then CNC’d it into a chunk of Iroko wood from our scrap hardwood pile. Again, you could do this with a router, a drillpress and a bandsaw, or even with handtools – but I took the shortcuts I had on hand. In retrospect, I should have left both ends of the pocket capped to avoid having to glue in a plate beneath the wheel, but I was making this up as I went. Then was a bunch of assembly – gluing the blocks together, a holesaw to create a recess for the wheel, routing the corners for a round-over, sanding everything, and epoxying the base of the wheel in place.
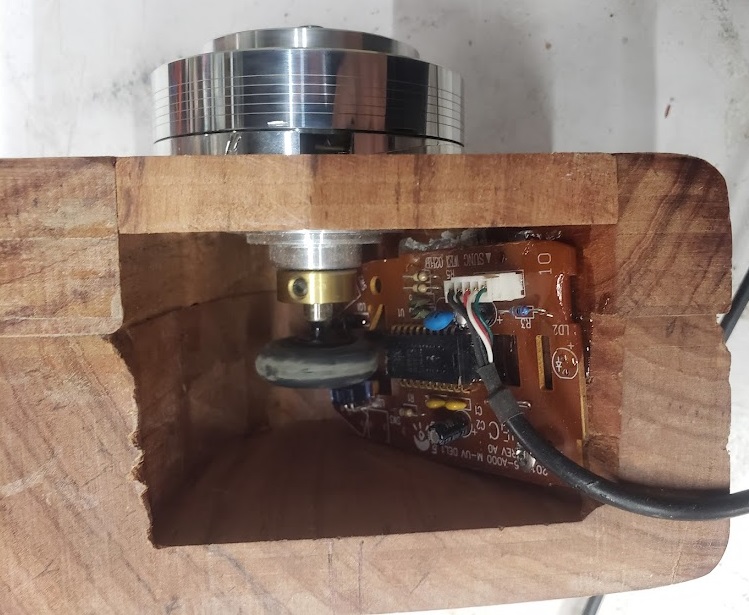
Now, all that was left was to attach the board so that the IR beam passed through the scrollwheel. I used a screw to temporarily mount the board while I tested it (and it worked great! I can scroll 7500 lines in excel with a hard flick!!). Once I established the location was good and there was no rubbing, I epoxied the board permanently in place. To finish, I added a small escape channel for the mouse wire, knotted the wire for strain relief, and finished with wax for a nice shine. And just like that, a project I’d had on my list for literally a decade was done in a weekend, and I couldn’t be more pleased with it.

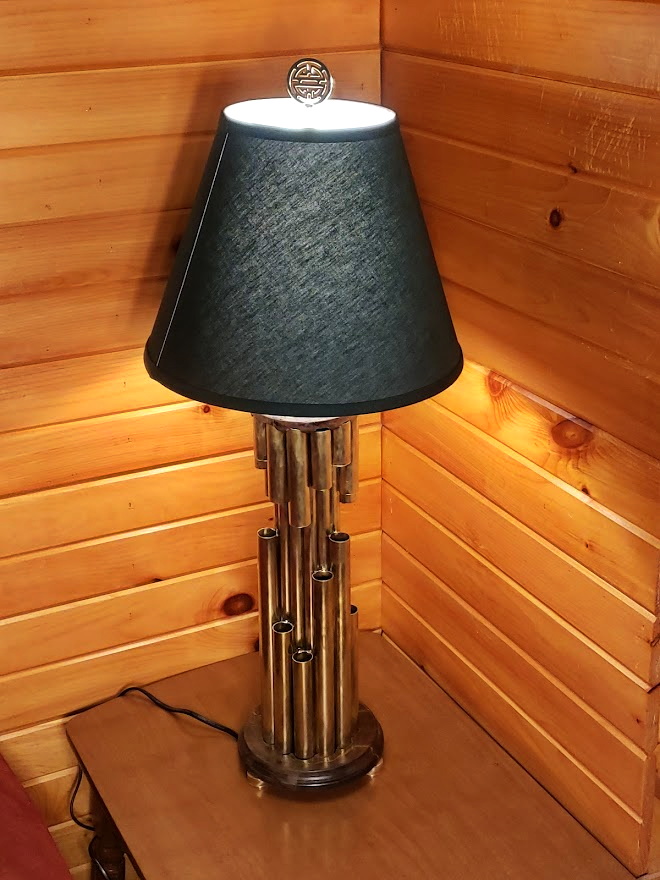
Art Deco Lamp

Another project inspired by Cowboy Bebop, this one an art-deco lamp glimpsed in the background. This time, I didn’t try to replicate the original, I just took inspiration from that glimpse and started brainstorming. Brainstorming turned into cad, and turned into an excuse to practice my cad. Which turned into an excuse to do trig, build spreadsheets of pipe lengths, and completely overthink the whole design. That’s going to be a recurring theme here – excuses to practice skills, try new techniques, and vastly try-hard the whole build. Because it’s fun.

CAD completed, I ordered some brass pipe from Online metals, and chopped it to size. I used the CAD to CNC some internal and external spacers (thank goodness the shopbot will let you scale files, I ended up needing to run at 102.5% for a snug but not impossible fit), and then used those spacers to hold the pipes in place while I affixed them. The first attempt was soldering, but that was a complete failure. So I TIG’d the whole thing, mostly because I needed practice tigging. It turned out needing a lot of cleanup, so if I were to do it again, I’d build it in two halves, left and right. I’d tig the tops and bottoms which are hidden in the bases, but I’d rivet the centers in from the inside. TBH, it could be done entirely with rivets, and you’d maintain the polished surface finish.

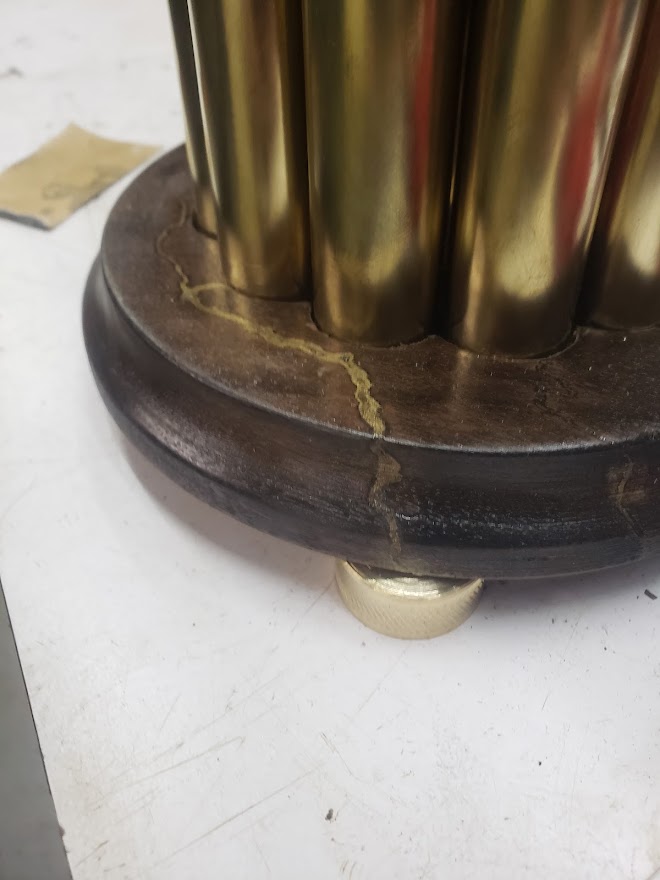
For the top and the bottom I used walnut, CNC’d the pockets in place to hold the ends of the tubes, and then turned them on the lathe. I could have done the shaping on the CNC, but (as you probably guessed) I wanted practice turning on the lathe. Once I had them shaped, I set about adding detail. I love the marbled look, but didn’t want to actually do marble, so I set about recreating the look with Lichtenburg burning. All the references recommend using Baking Soda dissolved in water to add conductivity to the surface, but looking around the shop we didn’t have any. Second choice was salt, but again absent in the shop. Looking around, desperate for ions, I found some borax – which actually worked beautifully. Using a 10kv high-voltage tester, I painted the dissolved borax solution onto the wood, then burned paths while blowing air with the compressor. The airflow deepened the burn patterns, which gave me more room to add bronze. Instead of telling you about inlaying bronze, I will instead link to Blanch Woodworking who has done all the experimenting, and who’s techniques I followed. TLDR: Superglue, brass powder, sand, repeat, repeat.
 |
 |
 |
After some stain and a lot of polyurethane, it was on to the feet. Again, this was just an excuse to play on the lathe, this time with machine tools instead of chisels. Knurling, pocketing, drilling, and parting.

After that, it was a pretty simple assembly. A top plate from SCS, a bunch of lamp parts (quite reasonably priced from Grand Brass Lamp Parts), an expensive shade from wayfair, and it’s done!
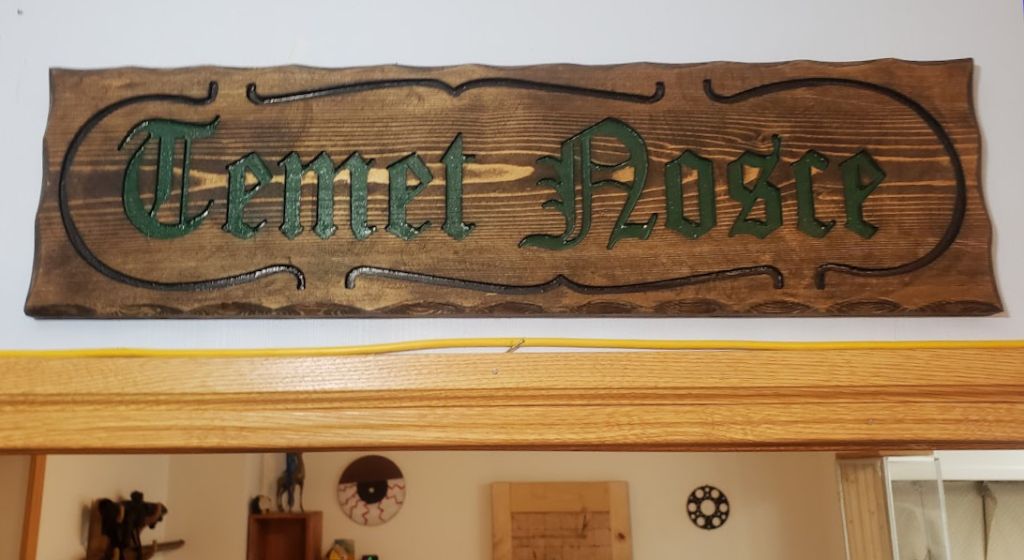
Temet Nosce
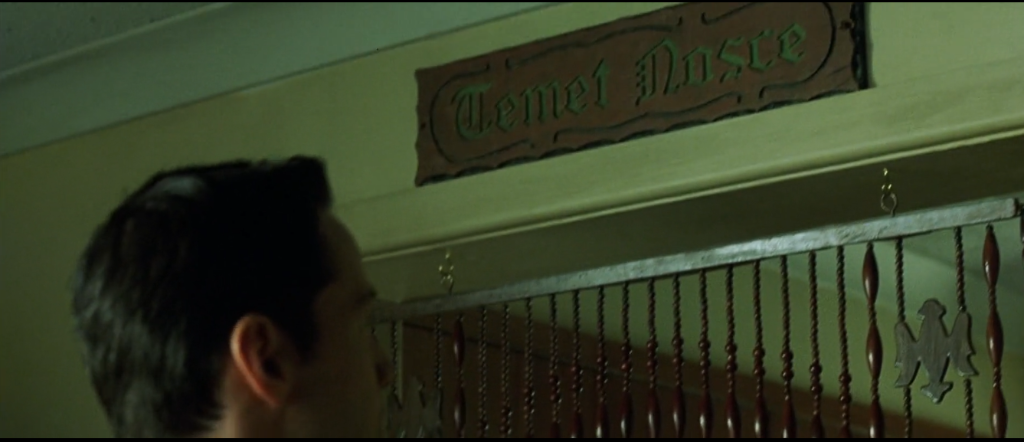
“Through and through. Balls to bones.”
Full DXF: temetnosce.dxf
Tip: Save yourself a lot of fiddly work: Paint the inlays, then sand, then stain
.
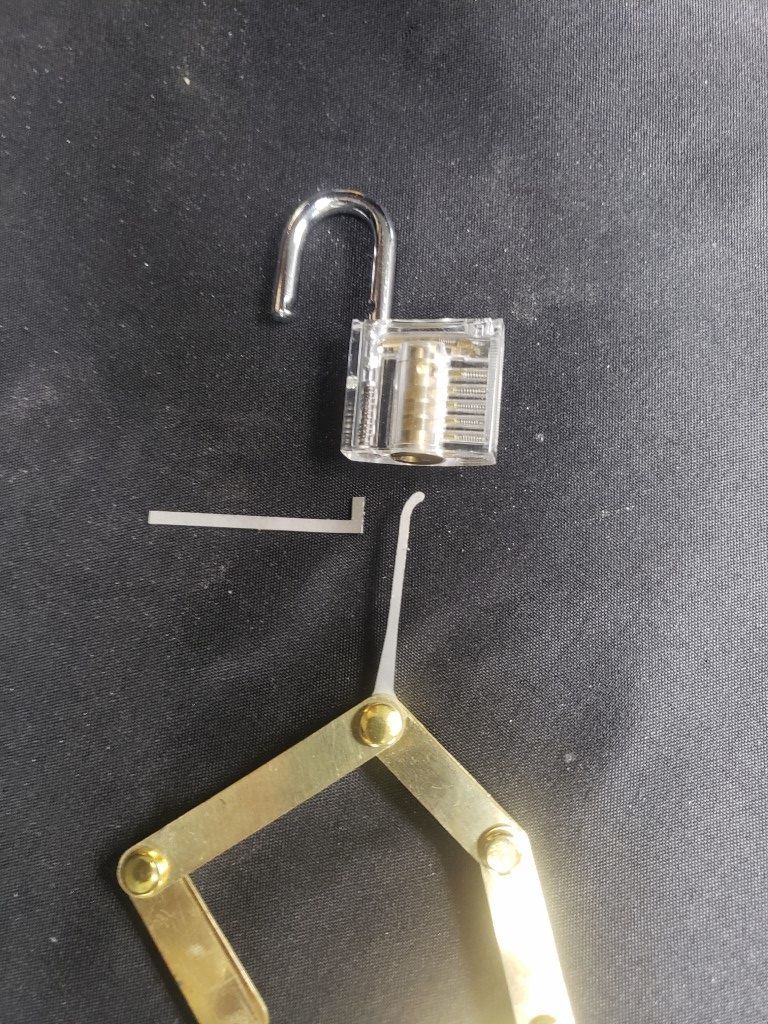
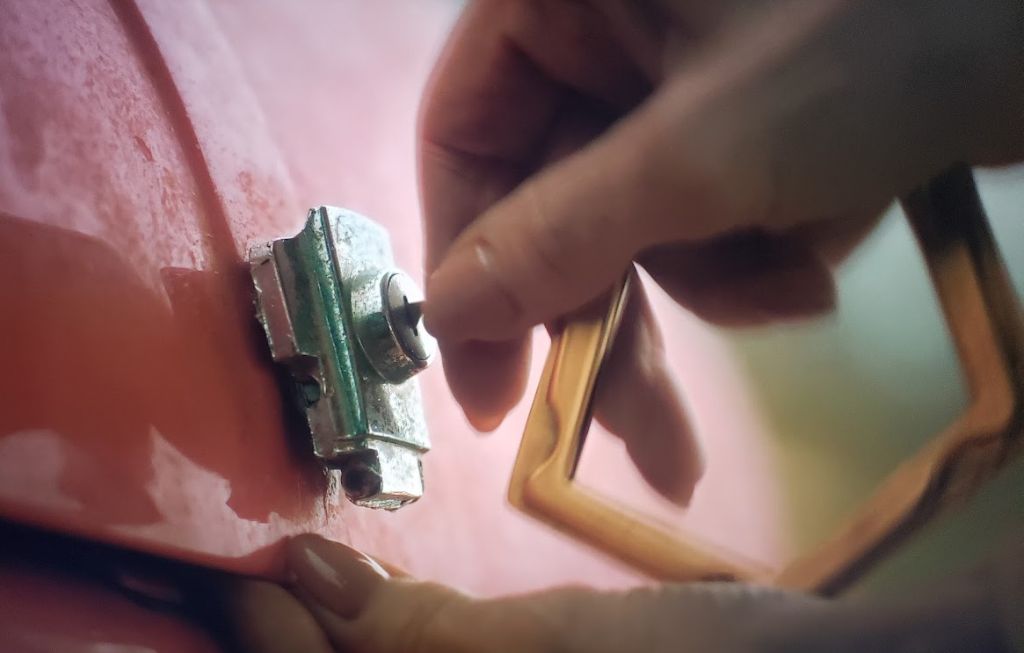
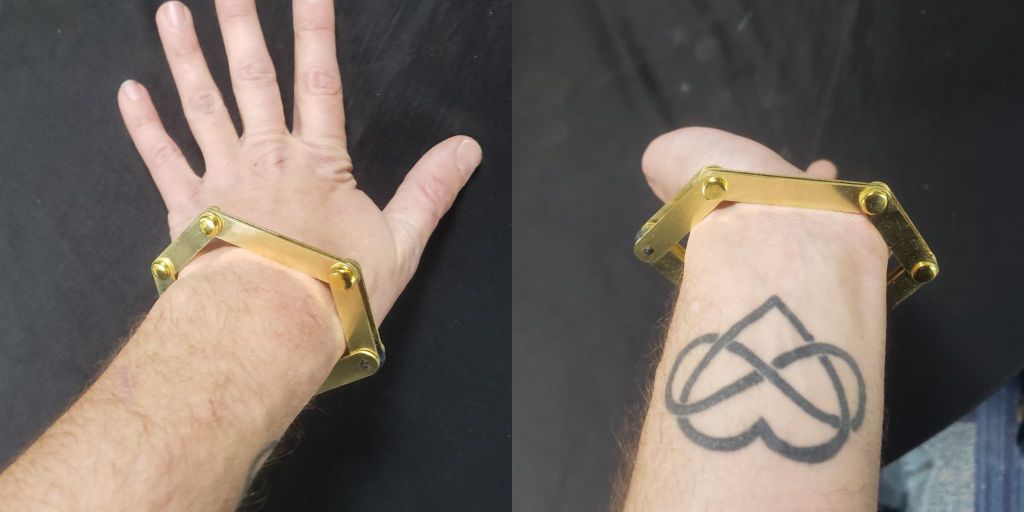
Prop Tutorial: Matsumoto’s Lockpick Bracelet from Cowboy Bebop
 |
 |
|
| “I’m always amazed people think valet keys will keep anything safe” – Matsumoto | ||
Introduction:
Watching Cowboy Bebop (Live action), there’s a shot where Faye’s mother Matsumoto slips off her bracelet, and hidden within is a lock pick set! I immediately fell in love with the concept, and started planning out the build in my head.
The first step was to work out rough sizing. I drew a circle in Solidworks and laid out a pentagon around it – matching the design from the show. Solidworks is pretty pricey if they don’t sponsor your Hackerspace with a license (Thanks Dassault!), but you don’t actually need it – I just used it because it was a quick way for me to get a basic idea. I laser cut the parts out of scrap plexiglass, built a few test bracelets in different sizes, and they were all terrible. Turns out wrists aren’t pentagon-shaped, so the corners constantly caught on things, and the whole bracelet was far too bulky. While accuracy was a priority, I wanted to make this real, and real meant usability was the main priority. After playing with a few different polygons, I settled on a hexagon as the most comfortable shape. If you want to go with the original pentagon, you should be able to modify your part order to do so. I believe in you!
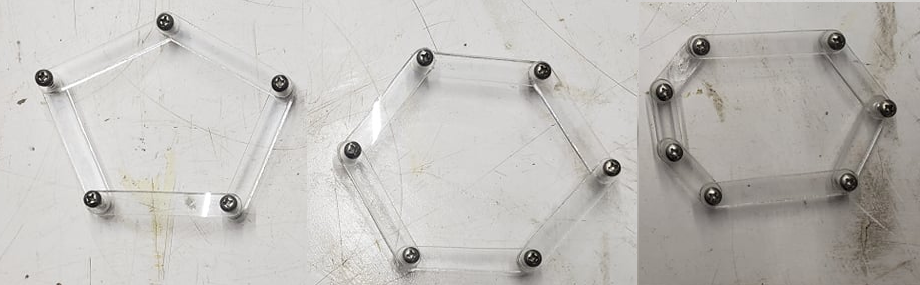
The drawings are sized to my 6.5″ wrist, but these plans should work for anyone with wrists between 5.5″ and 7″ in circumference. If you have larger or smaller hands then that, you can modify the DXFs and get a perfectly sized bracelet, but I recommend doing a test piece before ordering (even if it’s just printed out on paper and cut with scissors, having a tangible representation is super helpful). After working out the body of the bracelet, I had to design the picks themselves. I could claim I did a bunch of engineering and research… but I didn’t. I googled some pictures of a rake and a hook that looked like my favorite pics, and traced them in Inkscape. As dumb as it is, Inkscape is my favorite 2d cad program for doing anything artistic, and it’s free. Just make sure to export your DXFs in “inches” or “mm” and not “pixels” – or your SCS order (more details on that soon) will be far more expensive and comically large. To complement the pics, I needed a removable tension wrench. This isn’t shown in the show, but in my goal of making it usable I decided to go for it.

So. Design is great and all, but how do we make this real? That’s a lot of metal shaping, and I sure don’t have a laser that can punch through a brass… But do you know who does? SendCutSend! SCS will take your DXFs, turn them into metal parts, and send them to you for a very reasonable rate. I swear this isn’t a sponsored post…. but I am trying to suck up enough to get a SCS sponsorship for a BattleBot, so….. Moving on! I’ve used SCS for personal projects for a long time, and love how much time it saves. And I’m about to save you a bunch of time, because I’ve uploaded the entire bracelet partslist into a public cart, so you can order them without uploading the files manually. There’s always coupon codes for 10-20% off, so do a quick search for those before you order (or try NORUSH15). I think the order comes to about $22 (very reasonable!), but there’s a $29 minimum order. I deeply recommend just drawing something fun in inkscape and uploading it to get your cart over the $29 mark.
Materials:
Pick parts:
- Direct cart to order from SCS: https://cart.sendcutsend.com/pnkmgvsoyi30
- Note: This has versions of the long sides, with and without scallops. You’ll want to delete one of the options, or change quantities to get 2 of each.
- Note: This does not include the washers, since they’re too small for auto-approval, You’ll have to upload them from the DXF or dig some out of your stash
- DXFs if you want to DIY, use another supplier, modify, or add the washers: LockPickBracelet.zip
Magnets: https://www.amazon.com/gp/product/B076RV524B/ – optional, see below.
Rivets: https://www.amazon.com/gp/product/B08W36NNH1 – This was enough to do 2 bracelets, in brass, with enough extra rivets to last me years.
Tutorial:
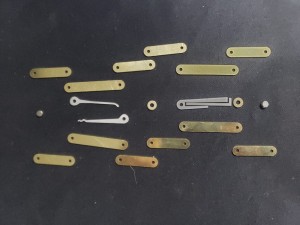
| Your send cut send order should look something like this! This is parts for two bracelets and a a disk for another project. |
 |
|
|
First, file the edges of the brass components. There’s a little edge where the laser starts/stops, leaving a sharp spot on each piece. Luckily, a few seconds with a file or sandpaper will take care of it.
|
 |
|
| Next, we want to lay everything out. It’s very important that we have the long brass sides immediately over and under the picks / wrench, this keeps everything tight and held in. The rest of the layout follows from that. I was trying different magnets in this picture, but the layout is correct. |
 |
|
 |
||
 |
||
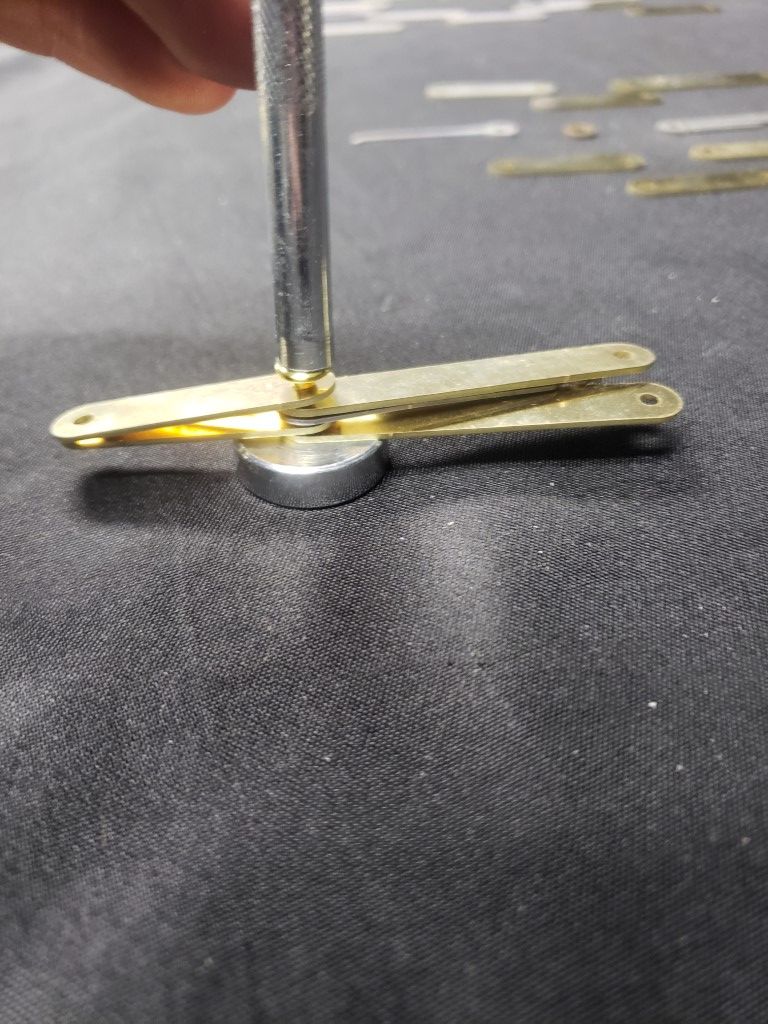
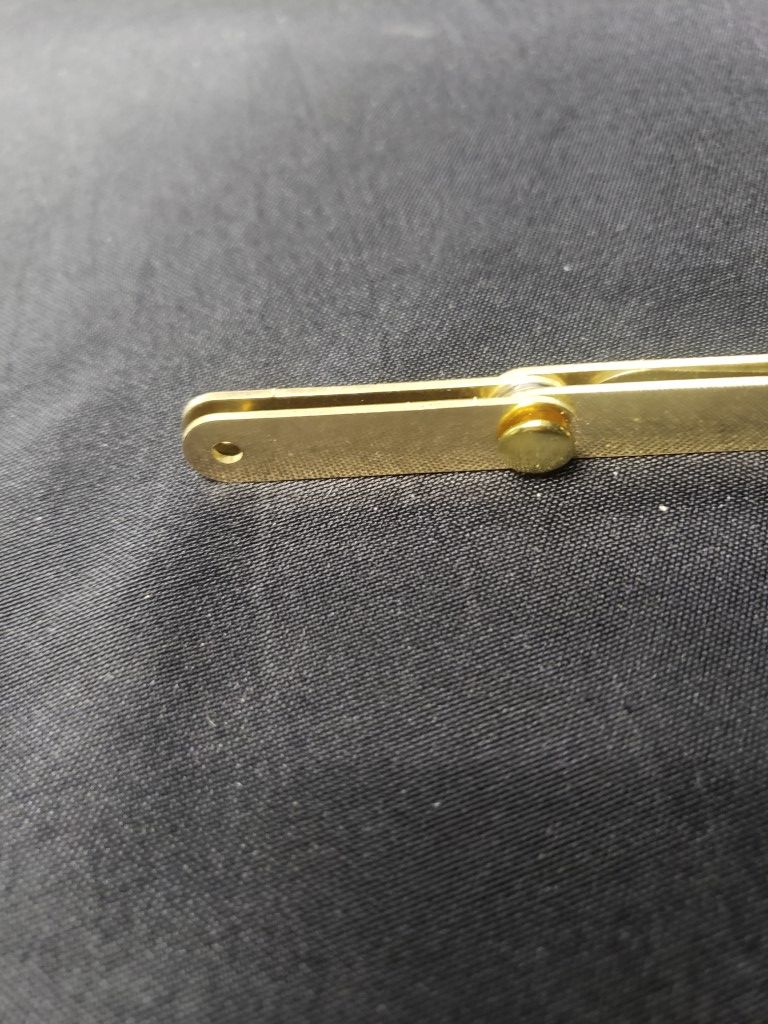
| Now, we’re going to rivet everything together. I chose to start with the lockpicks, work towards the wrench, and then do the endlinks. Thread the rivet through all the layers, put a cap on it, lay it in the anvil, and bash it decently hard. I was worried it would take a delicate hand, but I just smashed it until it was flat and it worked great. Despite what I show in the image, I didn’t even use the press tool, just whacked the rivets directly. (Note, You’ll notice I messed up the layout here. I make these mistakes so you don’t have to!) |
 |
|
| Now, repeat this the whole way around the bracelet! |
 |
|
| For my Bracelet, I lathed a turned a cylinder with nubs for the closure on our lathe. |
 |
|
Now that you are at the ends, you have to make a choice.
- If you have skinny hands, you can rivet the ends together and slip it on and off.
- If you have a lathe, you can turn up a little cylinder with nubs on the end, so that the bracelet will snap on and off.
- But the easiest option is to use magnets. You can either align them so that they will attract on the edges, or on the face.
- If you choose edges you get:
- Good holding strength,
- Slight asymmetry.
- If you choose faces you get:
- Great holding strength,
- Symmetrical design,
- A bit of a twist in it.
You can mock up the options before you attach them to see how they feel, but either way, just rivet them on there like you did the rest of the bracelet. I was afraid they’d be brittle and shatter when being hammered, but they took the beating just fine.
That’s it! Now onto the next project: Learning how to pick locks.