Not everyone has a place to store large equipment. We have a mixture of tools and equipment that we own and are on loan from other members. These include but are not limited to Grinders, Drills, Saws, a Welder, a Laser cutter, wood CNC and a 3D Printer!
Sometimes you don't feel up to working on anything and just want to sit back and socialize among like minded folks. Come hang out with us every wednesday!
Our group is made up of a diverse set of skill sets and backgrounds. If you need help work some idea you are working on, just ask! Most everyone is friendly enough to lend you a hand.
We regularly hold classes to help teach each other new skills. We've recently held classes on Cryptography, and Beginner's Electronics. We encourage everyone to teach a class, everyone knows something!
A hackerspace (also referred to as a hacklab, makerspace, or hackspace) is a community-operated workspace where people with common interests, often in computers, technology, science, digital art or electronic art, can meet, socialize and/or collaborate. Learn More at Wikipedia
We would love to have you join us. Stop by on Wednesday for Open Hack night and check us out or check out our meetup calendar for other events. Learn more about membership
Falling down a rabbit hole over 9sqft of floorspace
Also, cable tray! It’s not stupid if it works
[Downloads at bottom of Page]
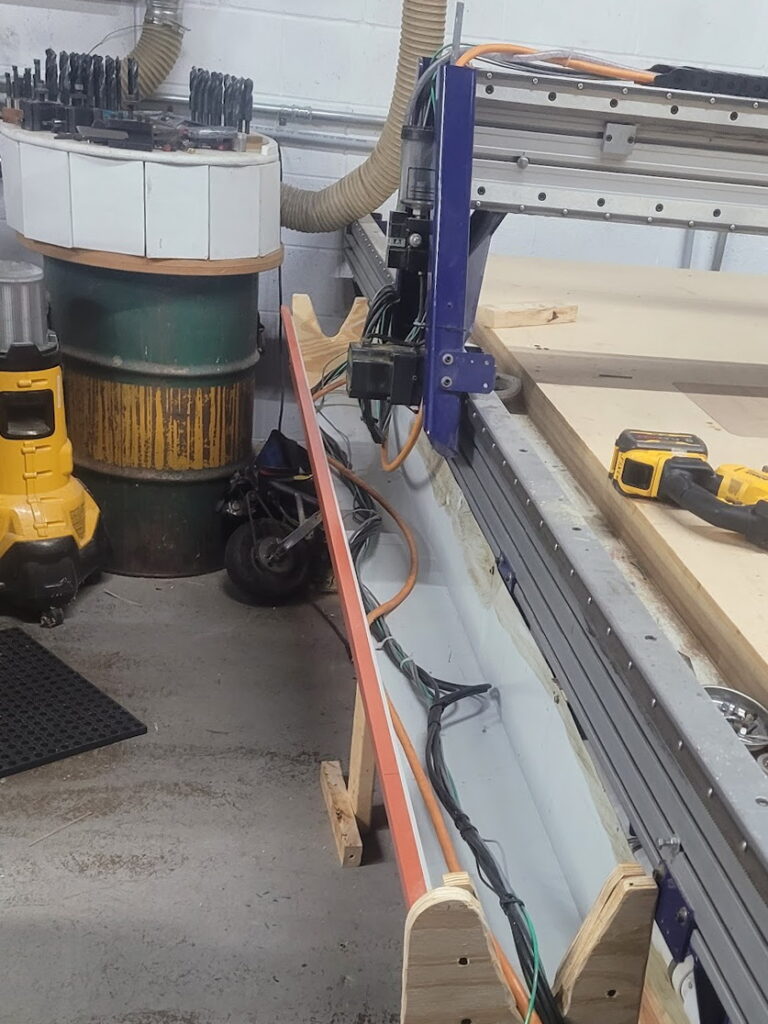
We’re looking at some new equipment for the space, which means… we need more room! We found a fair bit re-organizing, but this dust collection barrel caught our eye.
Look at this barrel: -Ugly -Inefficient -So much floorspace
This barrel is the first stage of dust-collection for our CNC – Air and dust come in one side, dodge past some vertical baffles, and exit to our main dust-collector for further filtering. Theoretically, the heaviest dust should fall into this barrel and be trapped, and over a few years of use it caught probably 20% of our sawdust. More importantly, it’s on the ground, and that’s space we could use for more tools!
Design:
The first thought was just to put it on legs. But if we’re going to go through the work of building a stand for it, maybe it’s worth redesigning the system! And thus, I began researching dust collectors. I originally intended to make a transparent baffle system – smaller, clear so you could watch, better baffling – but essentially the same thing. But the research said cyclones were the best, and I fell in love with the idea for sheer cool-points.
So I searched high and low for cyclones that fit our shopbot and dust-collector flow, but they were all opaque plastic or thousands of dollars. We don’t have 5 grand to spend on cool-points, so that meant some fabrication if my heart was set on watching the dust swirl. First idea! We can modify an existing clear cone that’s generally the right size. Nope, still 1000s of dollars.
At this point I was at a loss, and booted up chatGPT for some rubber-ducking. This started with general size and flow recommendations, before exploring alternate geometry… Would a cylindrical cyclone work? It would work well enough – but 8″ lexan tubing was also prohibitively expensive…. what about a polygonal prism mimicking a tube? How many faces do I need to be 90% as efficient? 95% as efficient?
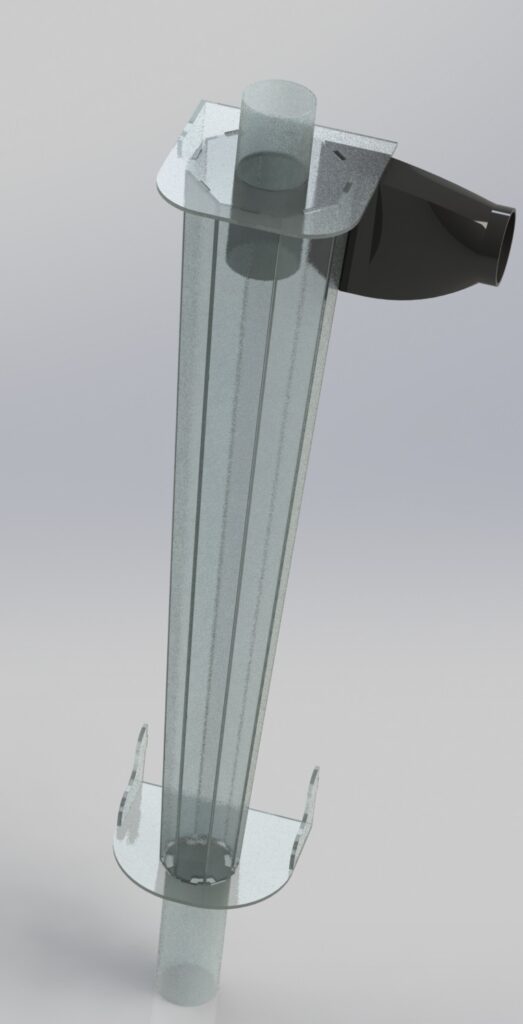
That’s when I realized I could switch the faces to trapezoids and approximate a transparent cone. From there, it was on to questions about injector dimensions/geometry/angle, exhaust port depth, and learning the ins and outs of cyclone design.
With a notepad full of dimensions and key features, it was off to CAD, where I set about constructing the cyclone and adjusting the design for manufacturability, mounting, etc. The end design was going to cost $380 at send-cut-send. Definitely more than I expected to pay when I started this, but I was too deep now.
I wasn’t quite ready to risk $400 on advice from a robot, so I sent my design out to other members at the hackerspace, and booted up grok to see if it would agree. After letting the gpts fight a bit (confirming assumptions, airflow, etc) they agreed it would definitely be more efficient than the old barrel, maybe much more efficient, and none of the humans saw any major flaws. So I dropped my orders, and after a few days 17 pieces of polycarb were on their way to the shop.
Theory
A quick primer on cyclone theory: The dust/air enters at the top, tangential to the walls of the cyclone. This induces a rotation, as the air/dust will begin to spin around the cyclone. The exhaust port needs to be lower than the injector – or at least lower than most of it – this forces the spiral and prevents the dust from short-circuiting the spin and heading straight up the tube.
Once the rotation is established, the dust is all flung towards the outward walls due to centrifugal force. Even though the dust is exceptionally light, it’s still heavier than the air, and an initial airspeed of 80mph means we have about 1000g’s of force pulling this dust outward once we hit the cylinder. This tornado of dust and air begins to descend down the cylinder, losing speed as some of the central (cleaner) air is sucked out the exhaust port on top. This is where the cyclone shape shines: Despite the air slowing, the shrinking diameter keeps the momentum up, keeping the dust flung out to the edges.
Finally, the tornado loses too much speed to keep the dust in the air, and the dust falls to the collection chamber below.
Construction
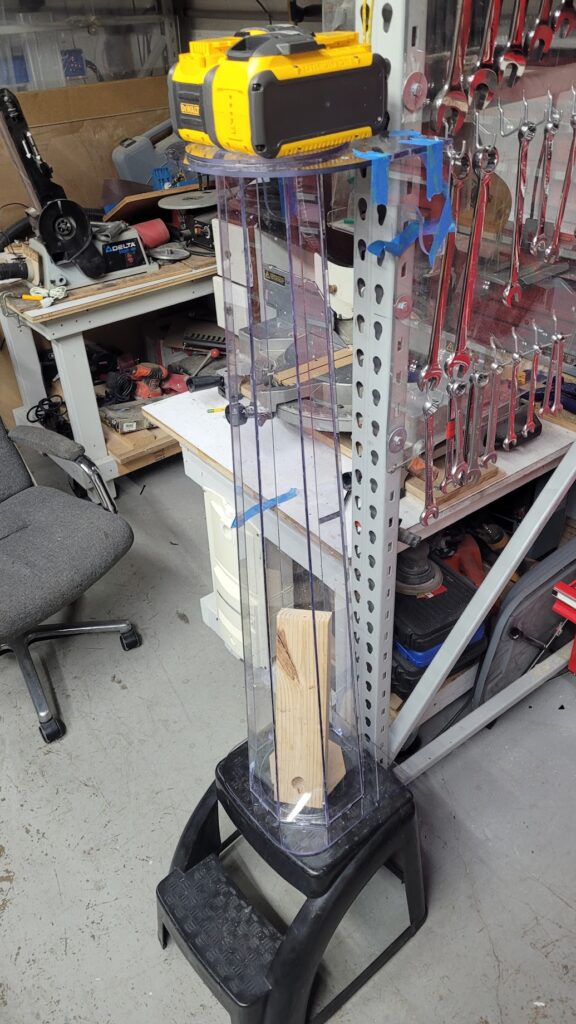
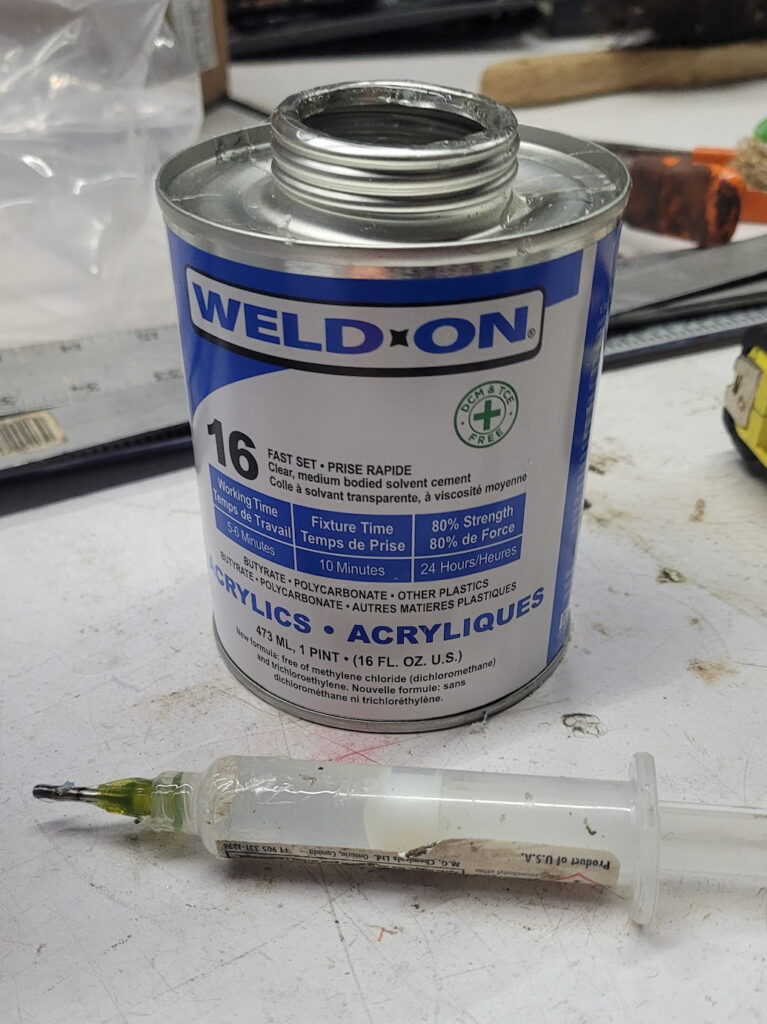
Now that all my parts are in, time for construction! The whole thing has to be glued together. I’m using WeldOn 16 (because chatGPT told me to) which is incredible at bonding Lexan. The glue-up was…. fiddly. I needed all the side panels to fit together at once, and one always fell out as I inserted the last few pieces. I ended up lasercutting a few temporary octagons to brace the sides, and had a friend help with a second set of hands while I got the first dots of glue in. Once it was partially glued, the rest went a treat, though somewhat slowly – I spent over 4 hours building the main cyclone body. Dribble a few drops of glue into a crack, move to a new spot, and repeat until there’s full coverage – I highly recommend a syringe for this so you can get the glue right where you want it and minimize drips / stringing (static cling is wild on this much lexan). A few of the trickier corners got a few dabs of silicone as well, just to make sure everything was truly airtight.
With the body assembled, it came time for the 3d bits. I printed the inlet adapter in PETG, and cut out a port for it to attach to at the top of the sidewall. If you’re building your own from these plans, please pick the appropriate adapter from the download file to bias air correctly.
The next 3d bits were the chamfers. A few internal chamfers at the top help establish the swirl early, improving efficiency. I embedded a copper wire in my chamfers, which will bleed static electricity, which should reduce friction from the dust sticking to the wall, also improving efficiency. These were glued in with the magic of WeldOn 16.
The only other non-plastic part was the lid gasket. I wanted to have access to the interior for cleaning and repairs, so I made the lid removable. A thin rubber gasket, etched with the laser cutter and cut with scissors, makes sure no air can leak through (especially important if you’re running ground-lines under the lid). In my build, I ended up clamping this lid on with clamps, but I’ve included boltholes in the updated models. You don’t need all eight bolts – in operation, the suction will hold everything in place, these are just in case the hoses tug the lid open.
Finally, I glued the collection pipe on. In retrospect, I regret this. I should have glued a threaded adapter to the bottom for more flexibility, better cleaning, easier mounting, etc…. but I was in love with clear and PVC isn’t clear. I did add a threaded adapter to the bottom for a clean-out plug. The weld-on appeared to be holding well enough, but it was such a tiny seam I glued in a 3d printed chamfer (externally) for some extra glue area.
And a can of WeldOn 16 (Please please please click this link regardless)
Results:
It was finally time to kick this on and see what happened. I was terrified it would immediately implode – there’s a lot of stress compressing this prism. A few of the members rallied around for support, and we hit the suck button. Immediately, we saw air swirl in and clean the top half of the cylinder, and as the CNC started cutting, a small band of chips orbited the top while the base tube started filling with dust.
Rough math (volume of dust * packing ratio / volume of material removed by CNC) is putting us just above 90% efficiency. This is significantly better than the previous barrel, and the quality of the dust (much of it is ultra-fine and very flammable, opposed to the flakey dust we used to get from the barrel) supports that hypothesis. The only downside is it means our dust reservoir needs to be drained after every major CNC session.
Membership comes with full access to all of our tools – though some of our tools require a quick one-on-one training session based on your familiarity.
Please click through our list and drill-down to what you’re interested in!
CNC Tools
Shopbot
5’x10′ Shopbot
3/4 hp spindle
Excellent at wood, foam, plastic. Aluminum is possible slowly with care.
Vacuum Hold Down for sheet goods
Professional Dust Extraction setup
Bridgeport
Manual, Conversational CNC, or G-code
100w C02 Laser Cutter
24″x30″ bed
Cuts wood, plastic
Engraves anodization great, engraves metal poorly
50w Fiber Laser Engraver
10″x10″ engraving area
Amazing at engraving metals
Accessories: Three lenses, rotary fixture
Prusa 3D Printer
We maintain a working 3d printer at all times
We also have several less-working 3d printers that could be yours!
Silhoutte vinyl cutter
16″ width custom monochrome stickers
This is how we do all the logos on Doomba!
Carpentry
Tablesaw
Cheap delta saw.
Sled, fence, nothing too fancy
Bandsaw
Sweet oldschool bandsaw.
12″ depth, 20″ throat
Compound Miter Saw
Dewalt, compound miter
Not sliding, but still a workhorse
Scroll Saw
Router Table
With fence, adjustable height
36″x26″ table
Hand Routers
Plunge and trim routers
Nailers
Dewalt Cordless Framing nailer
Pnuematic 18″ brad nailer
Dewalt 23″ headless pin nailer
Belt Sander
36″x6″ belts
Dedicated wood-only
Planer
Detla 12″ width
Jointer
Delta 6″ width
IMO the scariest tool in the shop but we offer training
Metalworking
Welders
MIG (120v)
Tig (240v), also does stick
Stick (120v / cordless)
500# Welding table for layout, fab, etc.
Plasma Cutter
Hydraulic tube bender
Harbor Freight special
Hydraulic Press
20 Ton
Angle Grinders
Corded
Cordless 20v and 60v
Bench Grinders
Anvil
Forge
Mostly for Aluminum casting
Sandboxes for molds
Crucibles, etc
BandSaws
Portaband
Oldschool 12″ depth, 20″ throat – make sure to change belts for steel, but it will eat aluminum all day.
After doubling our power, and quadrupling our cooling we were excited to test-drive our new laser and push the limits… and it wasn’t that far beyond our old laser cutter. Which seems wrong – it should be twice as good!
So we started tinkering with the other variables, and we discovered that the volume of introduced air plays a huge part in how efficient the cut is. Too little air – like our current airbrush compressor – and we wouldn’t clear the soot from our cut. Then we tried too much air, and learned it would burn massive gashes through our material. But between 15-30psi the laser cuts so well it feels like cheating. We should have done this literally years ago.
*Technically, it’s Free
Air is free. We unplugged the cheap air-brush compressor that came with our laser, and connected the air line straight into our shop air compressor. While an air-compressor isn’t free, every shop should have one, they unlock so many options. If you have a laser cutter and no air compressor, forget about upgrading your laser, buy an air compressor. It is a supremely versatile tool, enabling all sorts of pneumatic tools, cleaning, cooling, and (surprisingly) laser upgrades.
Anyways… we shoved a blow-gun into the air port, and just like that we went from struggling through 1/4″ plywood to cutting 3/4″ plywood. I think it took six passes, but it’s still mind blowing. But I’m lazy and would rather not get a hand-cramp for every cut, so how do we make this more professional?
The $50 solution:
We started by brainstorming our ideal setup: 1) It still has to work without the air compressor, 2) If we add the compressor, it should only use the high-pressure air while lasing, 3) It needs to be idiot-proof
Then, we designed to the spec: 1) “It has to work without the air compressor” We begin with two check valves. One to prevent air from from the air-brush compressor from escaping out the high-pressure port when the big compressor is detached, and one to prevent the high pressure air from damaging the weaker air-brush compressor.
2) “Without wasting pressure” Next, we added an air solenoid. Every laser controller will provide a GPIO (General-Purpose-Input-Output) that indicates when the laser is firing. For us, it was called “Wind,” and it was a 24v tolerant port that connected to ground when the laser fired. So by wiring that to a 24v air solenoid we can limit airflow to when the laser is firing.
2b) Bonus light: Because we have a 24v signal available, we decided we would use this to power a warning light to make sure everyone knew the laser was firing. And what better thing to light than the cut itself! So we added some LEDs to the enclosure to light the cut-in-progress. You could run these on the same 24v, but we fell down a rabbit hole and built a box to switch 120v using a solid-state relay.
3) “Idiot Proof” Since we’re running a communal shop, we want this to be super easy to use. Which means we need to regulate our airflow independent of the compressor settings – because hooking up 120psi will pop the hoses off of the fittings and potentially start fires. In a solo-shop, you could just write a note by the port and manually adjust pressure. But for our communal and semi-production environment, we wanted the assurance provided by a secondary regulator. We stole ours from a dead air-compressor we found in a dumpster, but you can (of course), order one on amazon for $16: Please click one of the affiliate links**. This gives us a super-convenient “saved” setpoint for the laser – we set it to 20 psi for the best all-around performance, but it can be easily tweaked during a cut.
(Note: You want the solenoid valve before the regulator – that way your pressure isn’t limited by the narrow internal passages of the solenoid). And just like that, we’re now routinely cutting thicker wood, faster, and keeping our lens cleaner at the same time!
**Full disclosure: we link only products we actually use, and we have not tried this regulator *** I had to spend to spend forever photoshopping this AI diagram. Trying to get gpt to get all the arrows correct ended up with this: